Implement Network Policies
Need help in this challenge? Check deployment files here :blue_book:!
Here is what you will learn
- learn about the differnet isolation approaches
- install cluster with either Azure CNI or kubenet and enable different NetworkPolicy solutions
- apply NetworkPolicy definitions to isolate workloads on one Kubernetes cluster
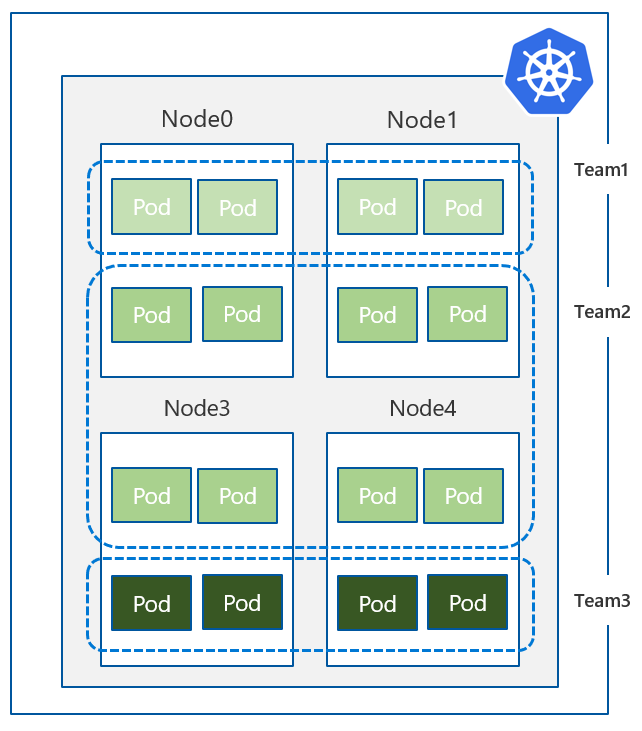
Tenant / Team / Environment Isolation
When it comes to isolating workloads with Kubernetes, there are two “high-level” approaches:
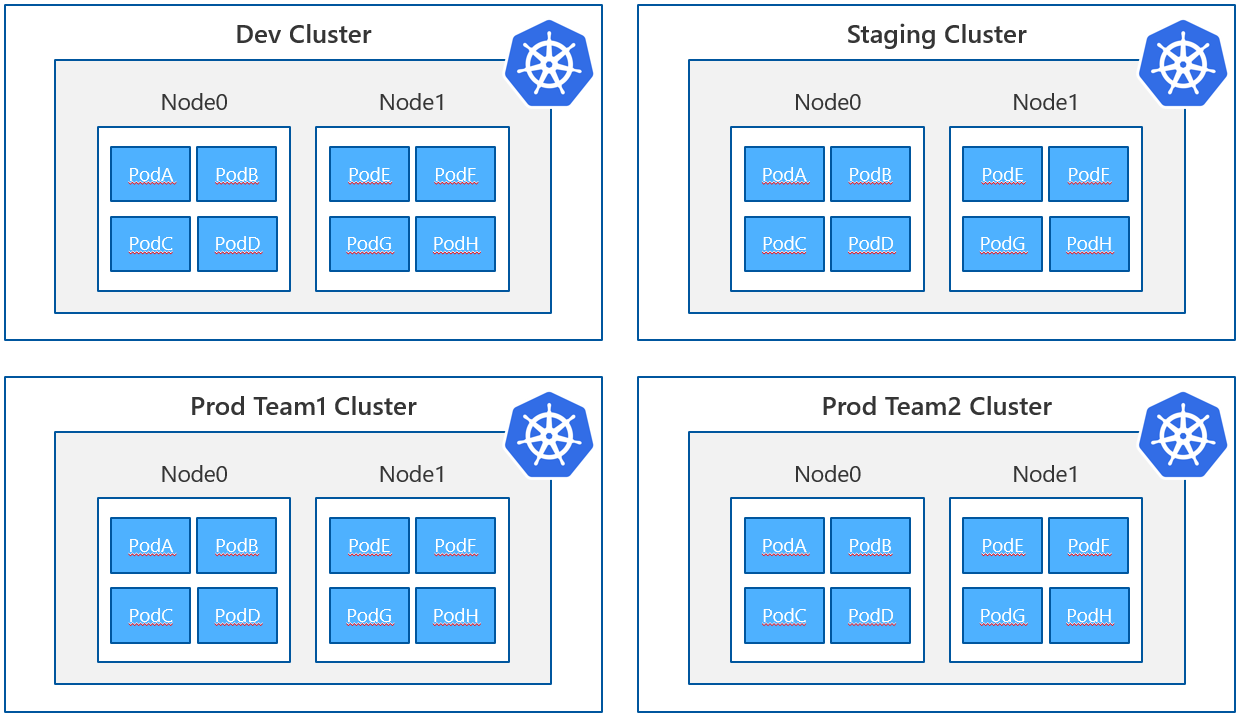
- physical isolation
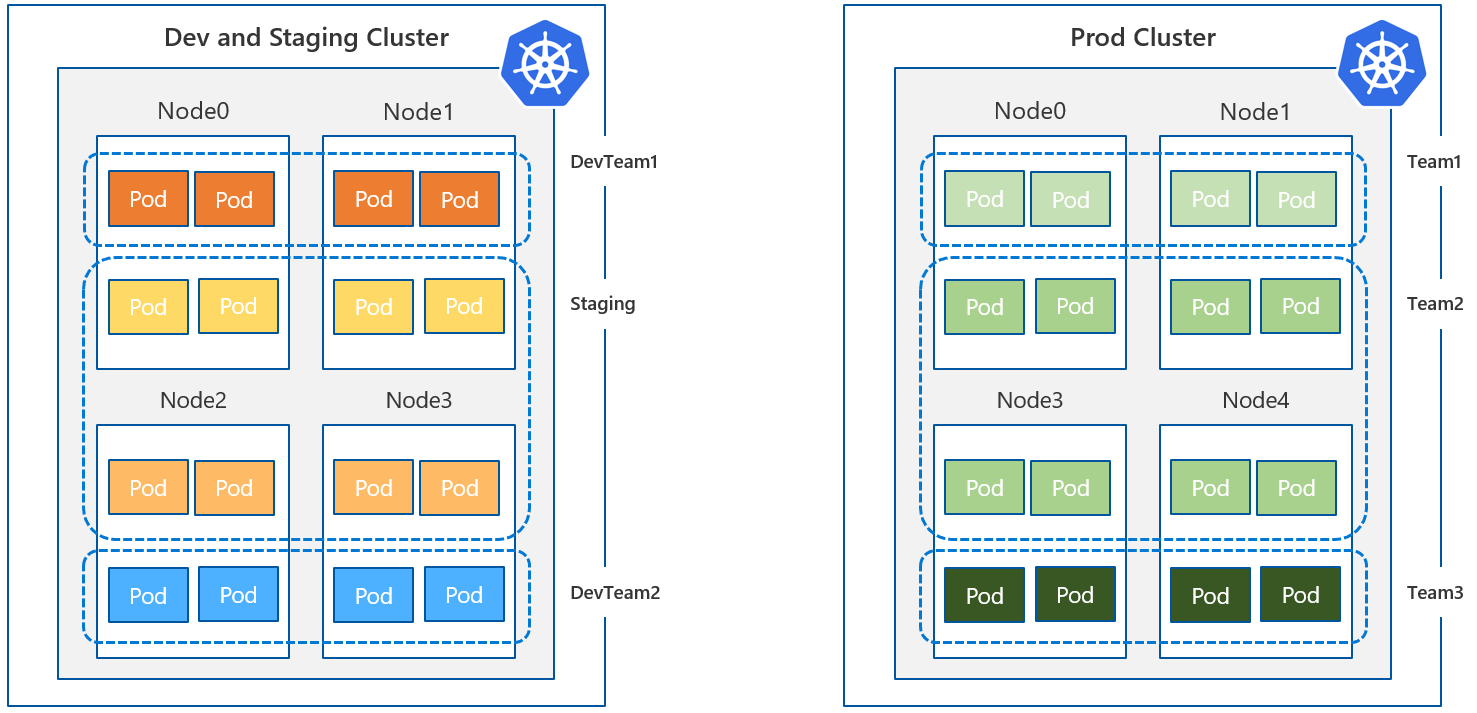
- logical isolation
Physical isolation is achieved by creating / running separate clusters for differnet teams or clients. That means every party has its own cluster and is fully isolated in terms of virtual machines / network etc.
Logical isolation means that you run one Kubernetes cluster and implement the “boundries” by adding and enforcing network policies.
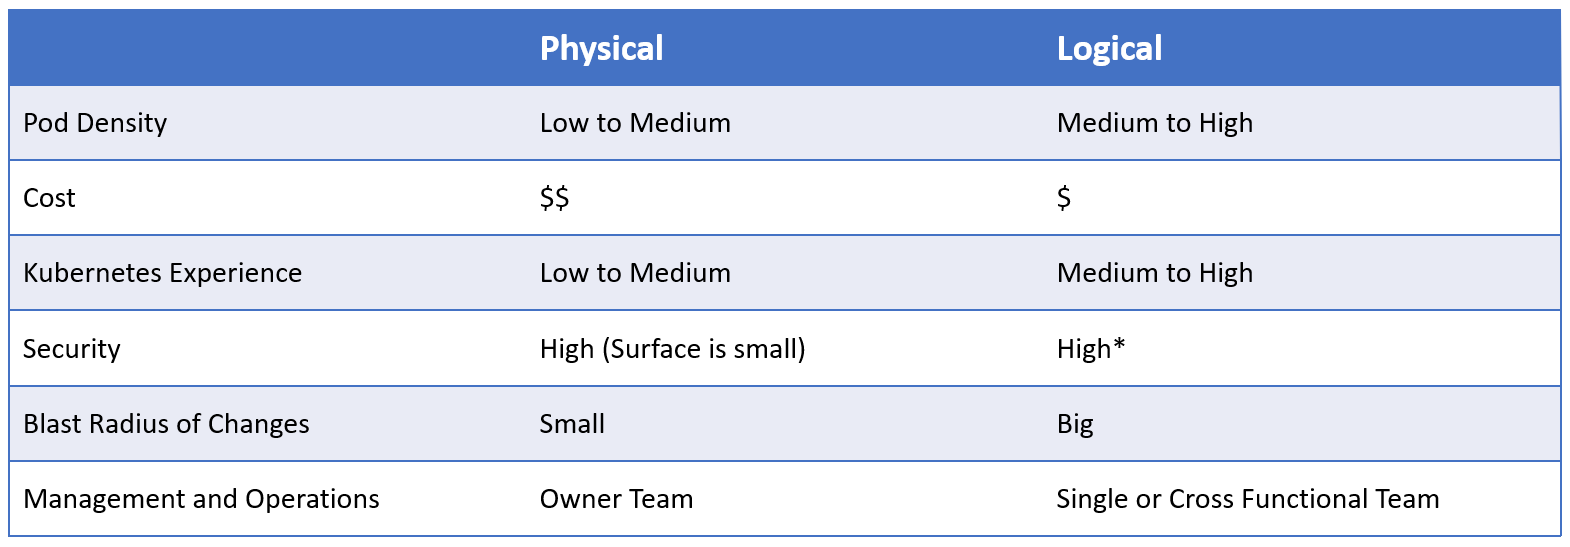 Isolation Strategies - comparison
In this chapter, you will learn how to work with the NetworkPolicy object in Kubernetes. To be able to test this, we need a new cluster. There are two options to work with Network Policies:
- Azure Network Policy Manager (NPM) - works in combination with Azure CNI
- Calico Network Policies, an open-source network and network security solution founded by Tigera - works with kubenet and Azure CNI
You can choose between these two options.
Option 1: Setup New Cluster with Azure CNI / Advanced Networking
For this example to work, you will need a Kubernetes Cluster with “Advanced Networking”. Please create a cluster either via Azure CLI or via the Azure Portal (you can find detailed information abput it here: https://docs.microsoft.com/de-de/azure/aks/configure-azure-cni#configure-networking—cli) and download the cluster config.
Advantages when using “Advanced Networking”:
- Each Pod in the cluster is assigned an IP address in the virtual network. The pods can communicate directly with other pods in the cluster and with other nodes in the virtual network.
- Pods in a subnet with service endpoints enabled can securely connect to Azure services (such as Azure Storage, SQL database, CosmosDB etc.).
- You can create user defined routes (UDRs) to route traffic from pods to virtual network devices.
Install Azure Network Policy Manager (NPM)
For network policies to be work, you need a special plugin that takes care of enforcing such policies. The Azure Network Policy Manager is such a plugin that is written with Azure networking in mind.
$ kubectl apply -f https://raw.githubusercontent.com/Azure/acs-engine/master/parts/k8s/addons/kubernetesmasteraddons-azure-npm-daemonset.yaml
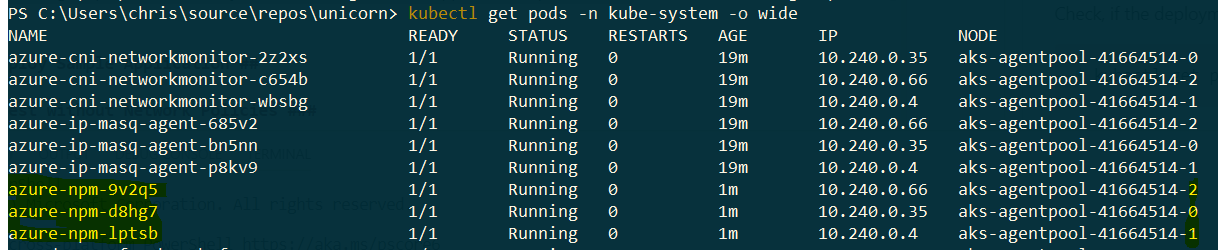
Check, if the deployment was successful:
$ kubectl get pods -n kube-system --selector=k8s-app=azure-npm -o wide
Option 2: Setup a new Cluster with Calico plugin
Create a new cluster either with Azure CNI (“Advanced Networking”) or with standard kubenet and enable Calico. For the sake of simplicity, the sample will show the latter option:
$ az aks create --resource-group <RESOURCE_GROUP> --name <CLUSTERNAME>
  --generate-ssh-keys \
  --network-policy calico \
  --network-plugin kubenet
Samples (work with both options)
To showcase the abilities of NetworkPolicies, we are going to implement a few samples.
Deny / limit traffic to an application
When it comes to running an application ontop of Kubernetes, there are situations where you want to limit (or even deny) the access to certain resources. There are solutions out there to such requirements, e.g. a Service Mesh, but approaches like that operate on Layer 7 from the perspective of the OSI model, whereas Network Policies are run on Layer 3 (Network) / Layer 4 (Transport).
Operating at the network/transport layer has the advantage of being universal, since all network applications use IP. At the network layer you can apply a policy regardless of the layer 7 protocol: DNS, SQL databases, real-time streaming etc.
So, what we are going to do, is deploy a NGINX application that serves as our “resource-to-protect”, apply samples of network policies and then compare the access to our resource without and with active policies.
Deploy Sample Application
Let’s start by deploying our sample application.
$ kubectl run nginx --image=nginx --labels=app=nginx --port 80
Expose the nginx pod via a service of type LoadBalancer
$ kubectl expose deployment/nginx --type=LoadBalancer
Check, that the service receives a public IP address via the Azure Loadbalancer
$ kubectl get svc -w
Test without Network Policies
Open your browser and navigate to the IP address of the ngnix service.
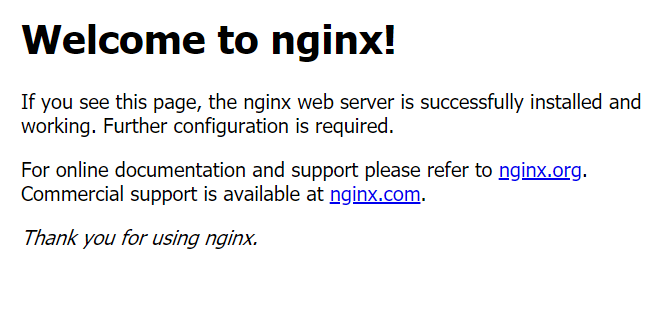
You should see, that the nginx pod serves request from the internet.
Setup Network Policies
When adding network policies, you have several options of how to define them.
podSelector- define to which pods the network policy should apply, based on pod labelspolicyTypeIngress- this is the default type and can be omitted. Defines that the policy should be applied for incoming trafficEgress- defines that the policy should be applied for incoming traffic
ingress.from-egress.to- …namespace-/podSelector- …
Now, let’s add a network policy, that denies all ingress for our nginx pods.
kind: NetworkPolicy
apiVersion: networking.k8s.io/v1
metadata:
  name: ingress-deny-all
spec:
  podSelector:
    matchLabels:
      app: nginx
  ingress: []
Check how Kubernetes applies the NetworkPolicy:
$ kubectl describe netpol/ingress-deny-all

Name:         ingress-deny-all
Namespace:    default
Created on:   2019-02-11 13:55:48 +0100 CET
Labels:       <none>
Annotations:  kubectl.kubernetes.io/last-applied-configuration={"apiVersion":"networking.k8s.io/v1","kind":"NetworkPolicy","metadata":{"annotations":{},"name":"ingress-deny-all","namespace":"default"},"spec":{"ingr...
Spec:
  PodSelector:     app=nginx
  Allowing ingress traffic:
    <none> (Selected pods are isolated for ingress connectivity)
  Allowing egress traffic:
    <none> (Selected pods are isolated for egress connectivity)
  Policy Types: Ingress
Test with Network Policies
Now check, if the nginx pod still is able to serve requests (remember the policy should deny all inbound traffic).
Isolate namespace from other namespaces
Namespace isolation aka. “logical isolation” pattern is very common when you want to separate projects / teams / clients in your Kubernetes cluster. With network policies, you can deny inbound traffic from other namespaces very easily.
Deploy Sample Application
To demonstrate access limitation to namespaces, let’s create two new namespaces.
$ kubectl create ns teama
namespace "teama" created

$ kubectl create ns teamb
namespace "teamb" created
Now deploy a NGINX pod that serves as a resource from “Team A” (teama namespace).
$ kubectl run web-teama --image=nginx --labels=app=web-teama --expose --port 80 -n teama
Setup Network Policies
Now, create the corresponding network policy that denies all incoming network traffic from other namespaces than “teama”.
kind: NetworkPolicy
apiVersion: networking.k8s.io/v1
metadata:
  namespace: teama
  name: deny-from-other-ns
spec:
  podSelector:
    matchLabels:
  ingress:
  - from:
    - podSelector: {}
The policy effectively means that every pod in namespace
teamawill allow ingress from all pods in in namespaceteama.
Test
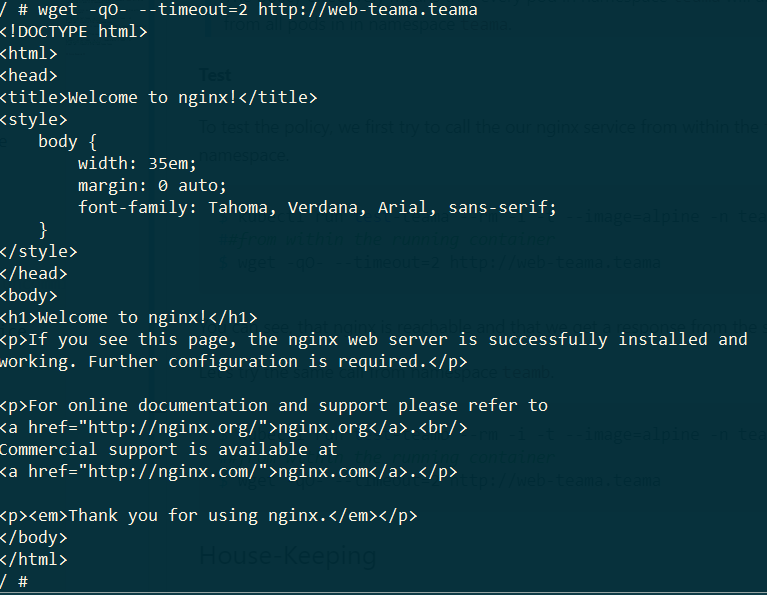
To test the policy, we first try to call the our nginx service from within the teama namespace.
$ kubectl run test-teama --rm -i -t --image=alpine -n teama -- sh
##from within the running container
$ wget -qO- --timeout=2 http://web-teama.teama
You can see, that nginx is reachable and that we get a response from the service.
Let’s try the same call from namespace teamb.
$ kubectl run test-teamb --rm -i -t --image=alpine -n teamb -- sh
##from within the running container
$ wget -qO- --timeout=2 http://web-teama.teama

You see, “Team B” cannot reach pods in the namespace of “Team A”.
House-Keeping
Remove namespaces, network policies and deployments/services.
$ kubectl delete ns/teama
$ kubectl delete ns/teamb
$ kubectl delete service/nginx
$ kubectl delete deployment/nginx
DON’T FORGET :point_up: If you don’t need the current Kubernetes cluster anymore, delete it.